Saturday, April 10, 2010

Composting on a small scale


Composters can be very expensive and sort of ugly. I found this one on a website for a large commercial home improvement store and, compared to everything else I saw, it was cheaper and not so much of an eye sore. It came with instructions so I'm going to follow those and see how it goes. They say it will only take 2-4 weeks to compost!

The company's instructions:

1) Set up your composter in a sunny spot to ensure your compost stays hot (95F - 160F) 130F - 150F will kill seeds and pathogens but don't go above these temps.

2) Add composting matter. Use 1/3 green to 2/3 brown to ensure a good finishing batch. Add a handful of fresh top soil to introduce new microbes. Manufactured accelerants may be used, be sure to follow the instructions on the packaging. Fill the composter half but not more than 2/3 full. Otherwise aeration will be reduced and microbes will be killed.

3) Turn the tumbler once a week and when new items are added. All materials should turn to a brown, moist, soil like material with an earthy smell for plants, lawns or vegetables in about 2-4 weeks.

If the composter isn't composting it might be too full. Remove some material and add more top soil. Check the temperature, it might be too cold or too hot and the composter will need to be moved to a different location. If nothing works then empty the bin and start over with old and new material.


Composting Ingredients:

GREEN - nitrogen rich 1/3
bread, cooked food, dairy, egg shells, fruits and veggies, garden/house plants, grass cuttings, raw meat and bones (sparingly), tea leaves/bags, coffee grounds, weeds (not gone to seed)

BROWN - carbon rich 2/3

bedding of pet cages, feathers, hedge trimmings, paper and cardboard, straw and hay, wood chips and sawdust, dried leaves and grass

NEVER ADD!!!!!!!

cat or dog litter/waste, ashes from a source other than wood, diapers, glass, plastic, metal, toxic materials, plants that are diseased or gone to seed

Composting tips:

Maggots can help compost but indicate a wet batch.
Breaking material down before composting will greatly reduce composting time.
Don't add too much meat or grass as they can make for a soggy batch and reduce aerobic bacterial growth.
Make compost tea by adding a small amount of compost to about a gallon or two of rain water for nutrient packed plant food.
Don't add paper with lead based ink on it.
Adding to a batch will increase compost time, so try to construct your batch all at once.

Friday, April 9, 2010

It always goes back to the roots

I've decided to start a garden this year! It will be my first ever but I figure better now than never! After days of hunting for a seed supplier I was able to find exactly what I was looking for, local organic heirloom seeds, and now we have 31 seed packets on their way. Each packet is a different type of seed, too. Since I have such a small yard I am going to grow mostly out of pre-made barrels and/or raised beds that Joe and I will make ourselves.

I still haven't found the fruit plants that I want but I'm still searching. What I'm looking for are goji, raspberry, blueberry, strawberry and apple. I'm also considering a dwarf banana tree! My top priority is the goji plant.

This plan to start a garden of my own is more than a spur of the moment idea, more than an extension of my desire to eat food that is pure and local. The need to have a garden and grow food for my family comes from a place deep, deep inside my heart that has been there since I was a tiny child.

My great grandfather built a log home and put down roots in North Carolina for himself and his family. One of his many children would end up being the greatest inspiration of my life. She would be my great aunt and I her great niece. Her own childhood was spent tending to the small farm, caring for her younger siblings and helping to make clothes for the family. They had an outhouse, no running water and no electricity, it was the early 1900's.

During my childhood my mother would frequently make the four hour drive south to Roxboro, N.C., to visit my great aunt with me and my siblings. By this time she was the only one still living in the log home her father had built. Since her childhood there had been some changes like indoor plumbing, electricity and additions to the house so it was much larger and you could only tell it had been a log cabin from the inside of the original part of the house. The kitchen still held a wood burning stove and a window which in days past peered out over the farm. During my lifetime the window looked through to where the laundry was but it was still there as a reminder of the way things were. What used to be the back porch had been enclosed and finished to include the only bathroom in the house, the laundry and lots of storage shelves plus a second refrigerator. The old water tank was still outside. The old tobacco houses were still across the street. There was a player piano that they had purchased in 1914, I believe it was. There was no shower in the house and only one telephone but there were two T.V.'s. The house had six beds in it but we always slept in my great aunt's bed and she would sleep at the foot of the same bed.

The time spent in that house with her was, and still is, the best time of my life! Yes, she spoiled us by giving us lots of candy, cake, ice cream and toys but it was more than that. We spent days harvesting her garden, feeding her chickens, playing among her flower beds, hanging clothes on the line to dry and cooking large meals for a large family gathering. There was so much love in that house and in that woman. She made everything from scratch and most of the food came from her garden or a friends garden. No one called it organic or non-gmo, it just was. It was pure, it was real. That's what she was about.

Other than these visits my little life was nothing more than what came to be the standard way of life, a rat race. Everything came from a store, from a box, from a manufacturer and every day was the same. We lived in a community of strangers and were too busy to spend time together. While in Roxboro people knew who we were and cared about us. We visited with neighbors, friends and other farmers. There was a closeness and a sense of community that I have never felt since then.

It's extremely unfortunate but my own children will never meet her and never visit the family home in North Carolina. It isn't our family home anymore, it belongs to someone else now. As sad as that is to me I have finally found my way back to her good roots. They are still alive in me and I am going to let them out! My kids will never know that place and time but I am going to do everything I can to make sure they know those roots.

I love you, Tean.

This is the beginning.


That is a picture of our south facing side yard. It gets the most sun. I started getting the area ready to remove the bushes because this is where our garden will go. The job turned out to be a much harder task than I ever could have imagined. Did you know that bushes like to shoot roots several feet away and start new bushes? And they mean business, too. Those shoots were the great explorers of their time, they went deep and far around landscaping structures in search of a new spot!

Thursday, April 8, 2010

Growing Goji Berry Plants


In my search for the best goji plants and seeds I became frustrated and overwhelmed. Those feelings led me to the decision to just take the seeds out of the organic dried fruit that I already had in my kitchen! I purchased some recycled seed starting trays that came pre-filled with organic starter soil. Taking the seeds out of each dried berry was very tedious and not much fun at all. Each berry had between 25 to 45 or so seeds inside it so at least I didn't have to do that many!

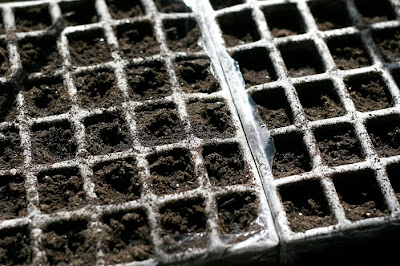
After I had all of my supplies, the trays with dirt and the seeds, I was ready to start! I put five seeds in each cell. With two trays at 36 cells each, I planted 360 Goji seeds! I covered the seeds in their holes, the place they will call home for a while, and then sprinkled some luke warm water over them and placed them in the sun by our front door. I already love these little guys and gals!!

Planted on Thursday morning, April 8, 2010. The weather is sunny and 50 degrees. I wonder how long until we see some sprouts, if we get any at all...


Friday, April 9, 2010


Last night I finally found what I was looking for! It took almost a week of researching online in my free time but I did find a website with very detailed information on goji seeds, plants and thorough care instructions. Today I took my seed starting tray (pictured above)and made some changes. After giving it some more water I covered it with plastic (used the plastic it came wrapped in)and poked holes all over it so air could still circulate. Then, I placed the tray in shade, not sun. The plastic cover is said to speed up the germination process and the seeds apparently don't need sun until they are established plants.

Tip: someone else said they cut their dried fruit in half and planted them like that with success.